Tutorial: eLearning Course
Create your first eLearning course using the eLearning template
Tutorial: eLearning Course
This hands-on tutorial walks you through creating an eLearning course using the built-in eLearning template. By the end, you'll be comfortable with the core workflow — from exploring the template to publishing your finished course.
To get started, click the Create e-learning card on the home screen:
Step 1: Explore an E-Learning Template
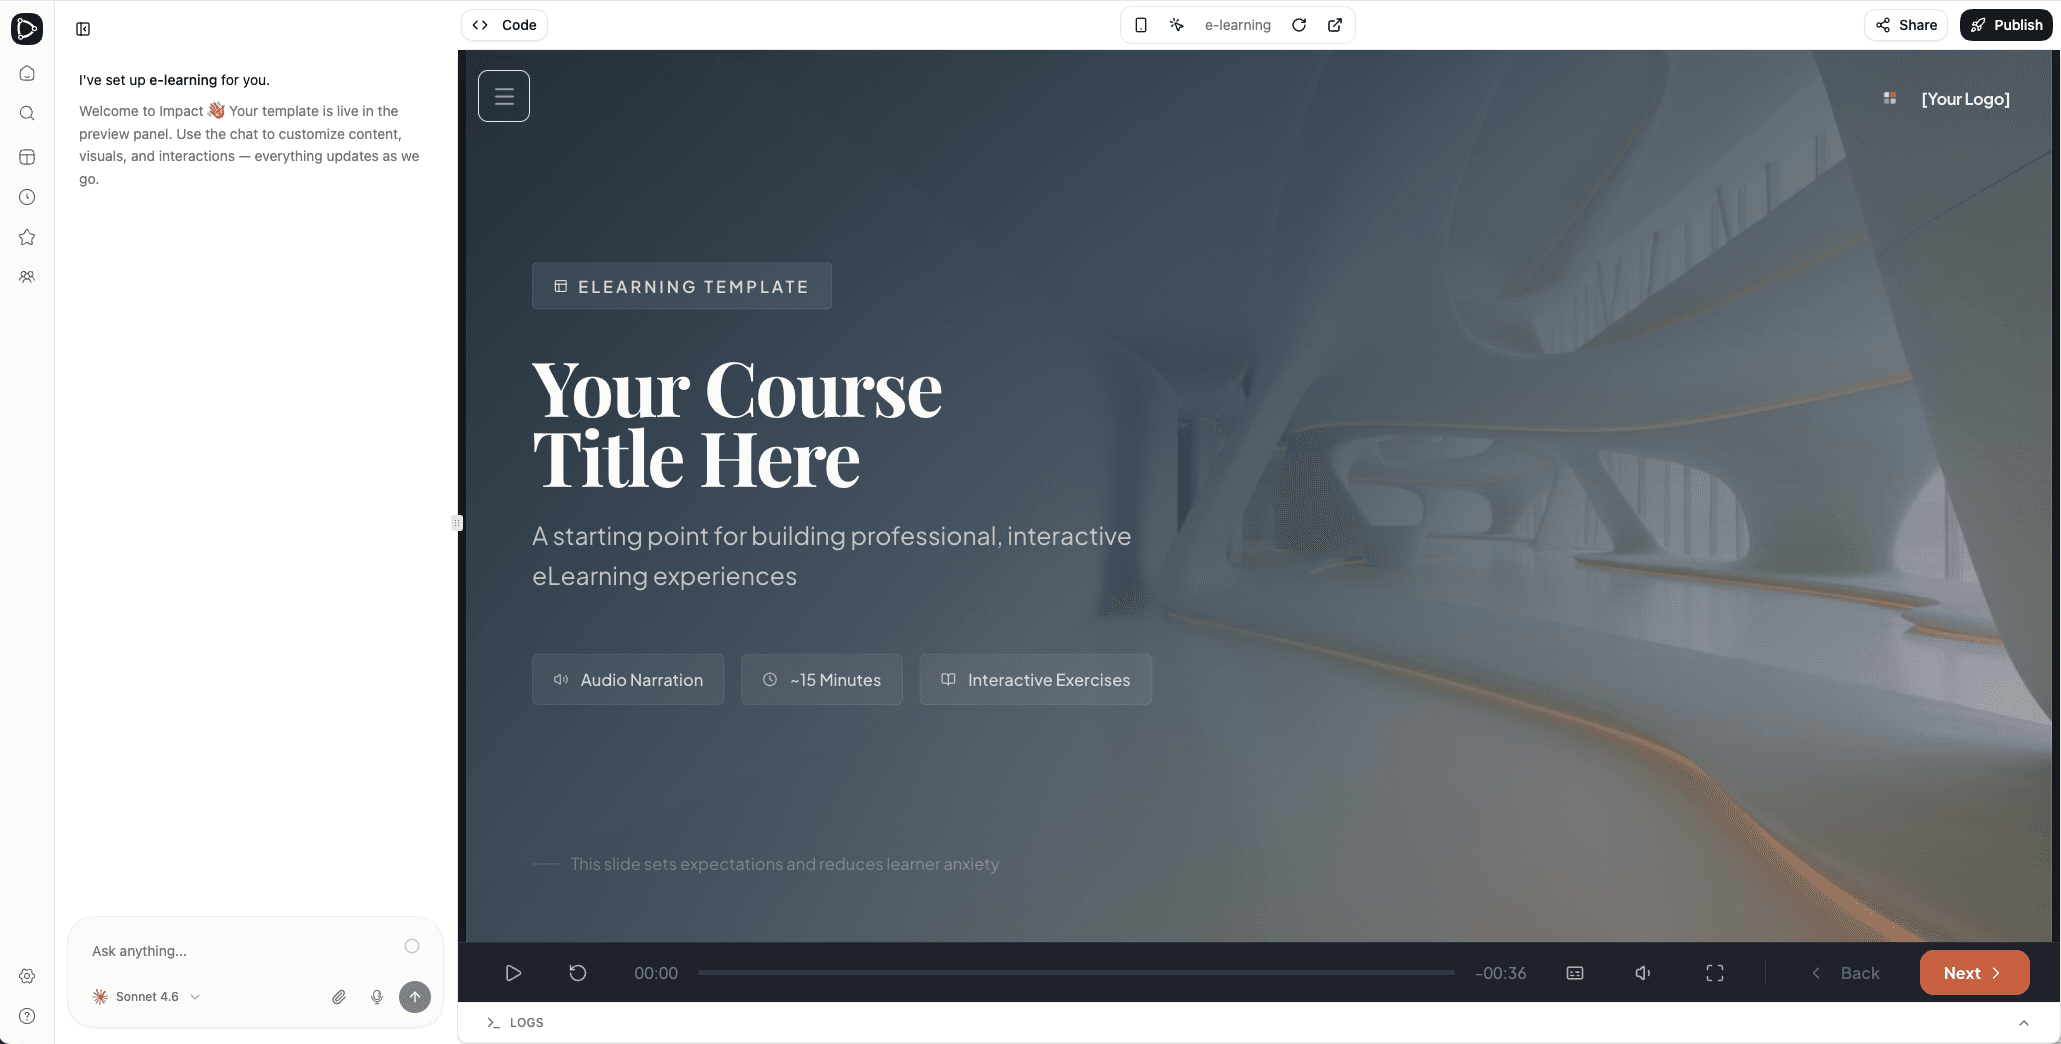
Start by opening one of the built-in e-learning templates. Scroll through the pages to get familiar with the different page ideas and types available — page layouts, interactive elements, assessments, and more.
Each template includes not just the slides themselves, but also built-in guidance for design, content level, interaction patterns, and learning quality. This guidance helps the AI agent understand both the course structure and the pedagogical intent behind the template.
The templates are created by professional instructional designers and come with specific pedagogical ideas and principles built in. Keep in mind that they do not necessarily match your target group or business case — they are examples and inspiration for both the AI agent and human designers. The idea is not to use these slides strictly as-is, but to understand what's possible.
You can always create your own template tailored to your target group and use case, and iterate on it over time as you accumulate insights and feedback from learners.
While exploring, take note of the player functionality: navigation controls, subtitles, and full-screen mode.
Make the AI Understand the Template
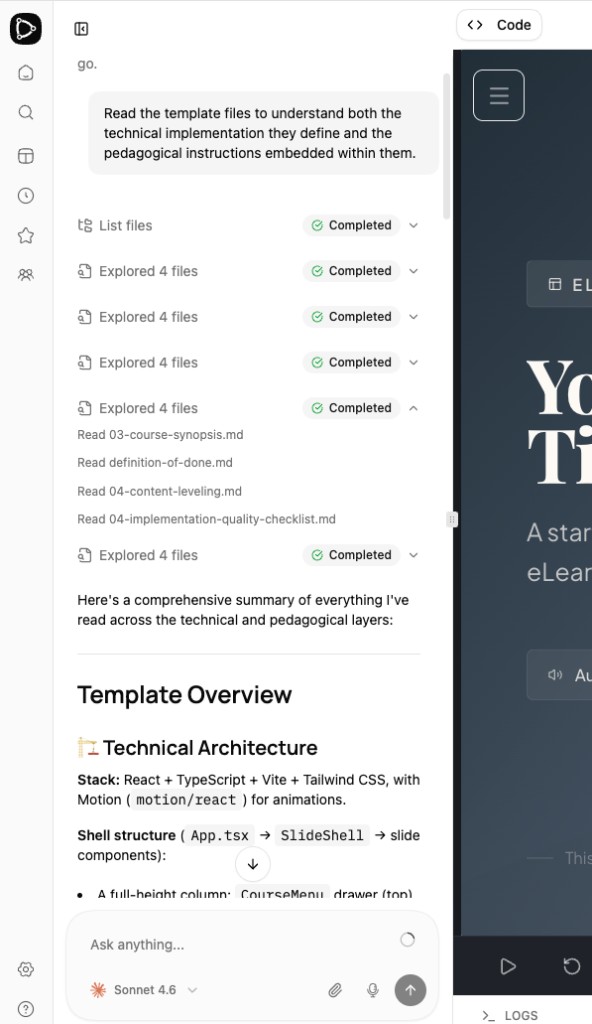
Before generating your first course, let's make sure the AI agent understands the template and the pedagogical guidance embedded within it. Give your first prompt something like:
Review the template guidance and explain the learning structure,
design approach, and pedagogical principles it recommends.
After running this prompt, the AI agent provides a summary of what it has learned from the template, so you can confirm it understood things correctly before moving on.
If you wish, take a moment to review the summary and make sure it aligns with your expectations.
Step 2: Create Your First Course
Now let's put the AI agent to work. In this step, you'll create a short e-learning course by giving the agent a prompt along with source material.
Download the Tutorial Files
This tutorial simulates a typical workflow where you have source documents, a logo, and brand guidelines to work with. To follow along, download the example files below — they use Bevel AI's look and feel. You can of course replace them with your own logo and brand guidelines to make the course truly yours.
-
Download: Artificial Intelligence Basics (PDF)
-
Download: Bevel AI Logo (SVG)
-
Download: Bevel AI Brand Guidelines (Markdown)
Tip: Uploading source material is optional. You can also proceed without any files and rely on the AI's built-in knowledge, or simply type or paste additional content information directly in the chat. But providing source documents helps the AI produce more accurate, tailored content — especially for domain-specific topics.
Give the Prompt
Drag and drop the files into the chat, then enter a prompt like this:
Let us create a new eLearning course titled "Artificial Intelligence Basics".
Please use the attached source material file, logo, and brand guidelines
to produce the first draft of the course. The course should be only 4 pages
long and intended for a non-technical audience. It should include narration
audio and subtitles for the narration. Please select only the most important
topics from the source document.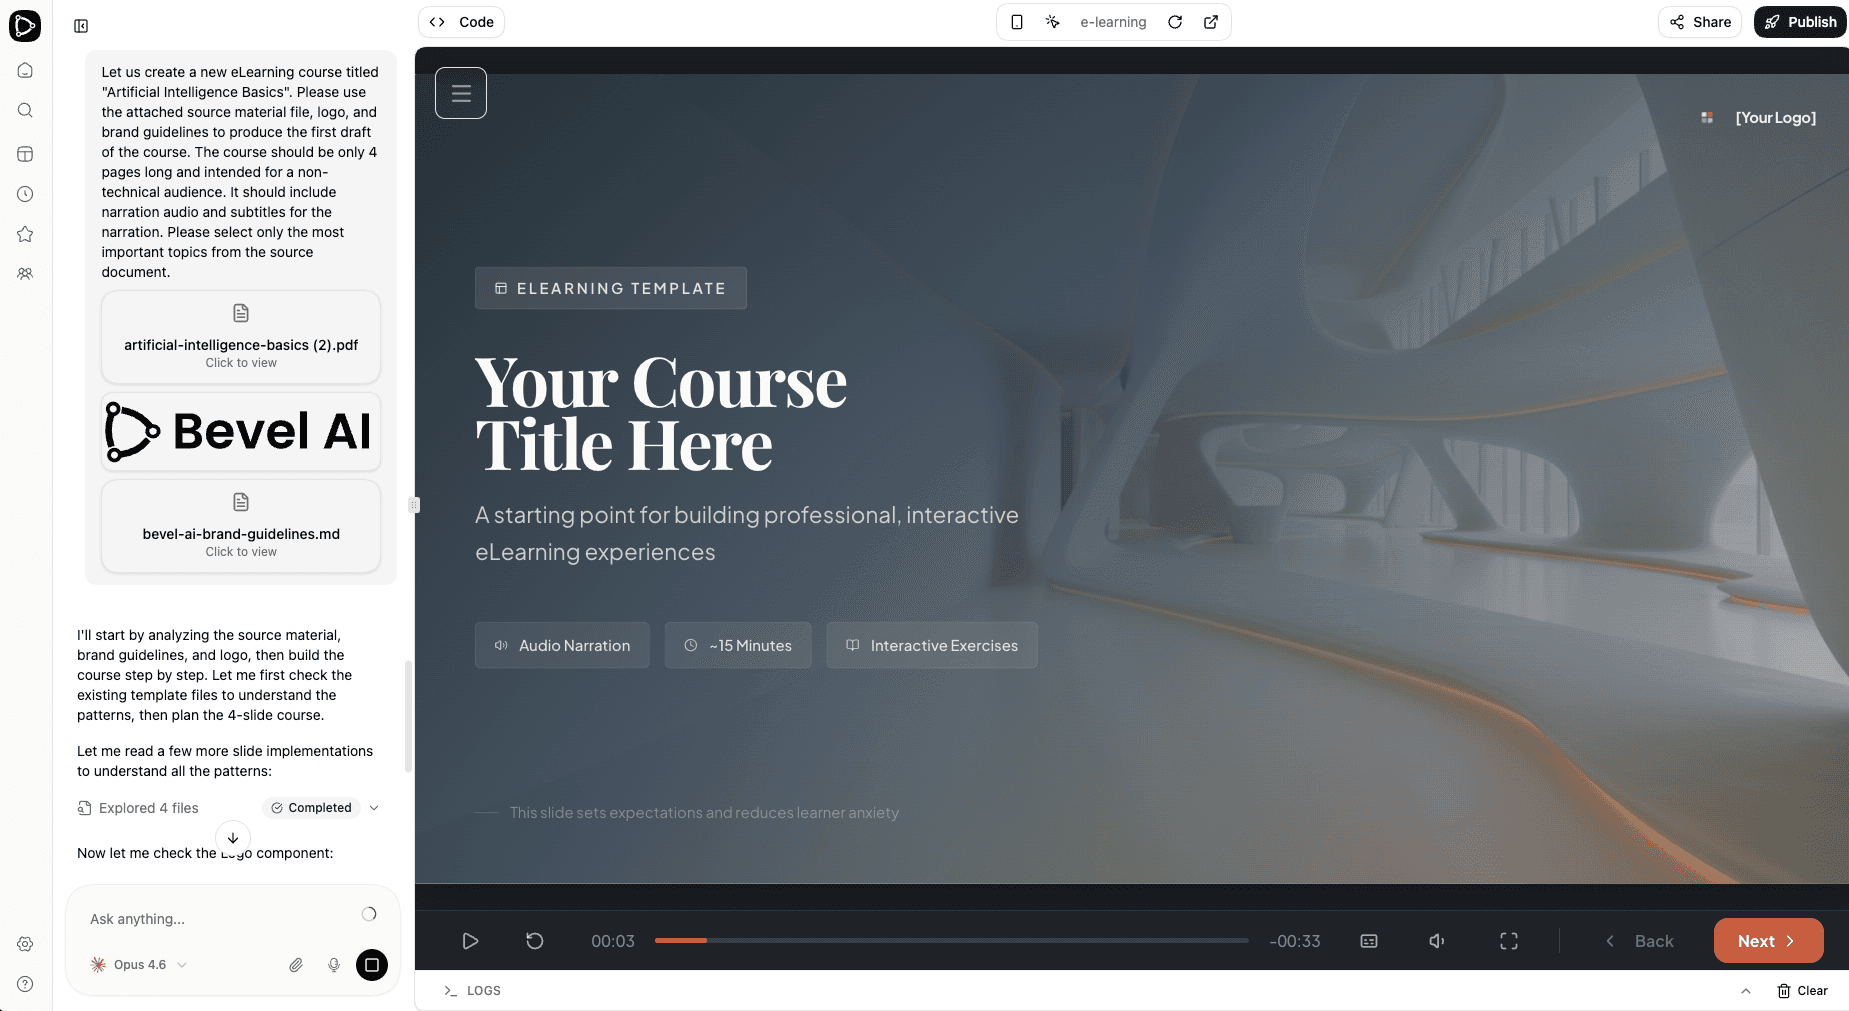
At this point, the AI agent explores all the source materials you uploaded, combines them with everything it has received in the chat — including the template structure and the pedagogical instructions embedded within it — and produces the first version of your course. This includes page content, narration audio, and subtitles.
This typically takes 6–8 minutes for a short 4-page course like this one. For a longer 20-minute e-learning course, expect generation to take more than 10 minutes. Throughout the process, the AI agent keeps you up to date — it tells you what it is generating at each moment, so you always know where things stand. You can also click the "generate images" and "generate audio" text links in the chat response to see which assets are already being generated.
Your First Draft Is Ready
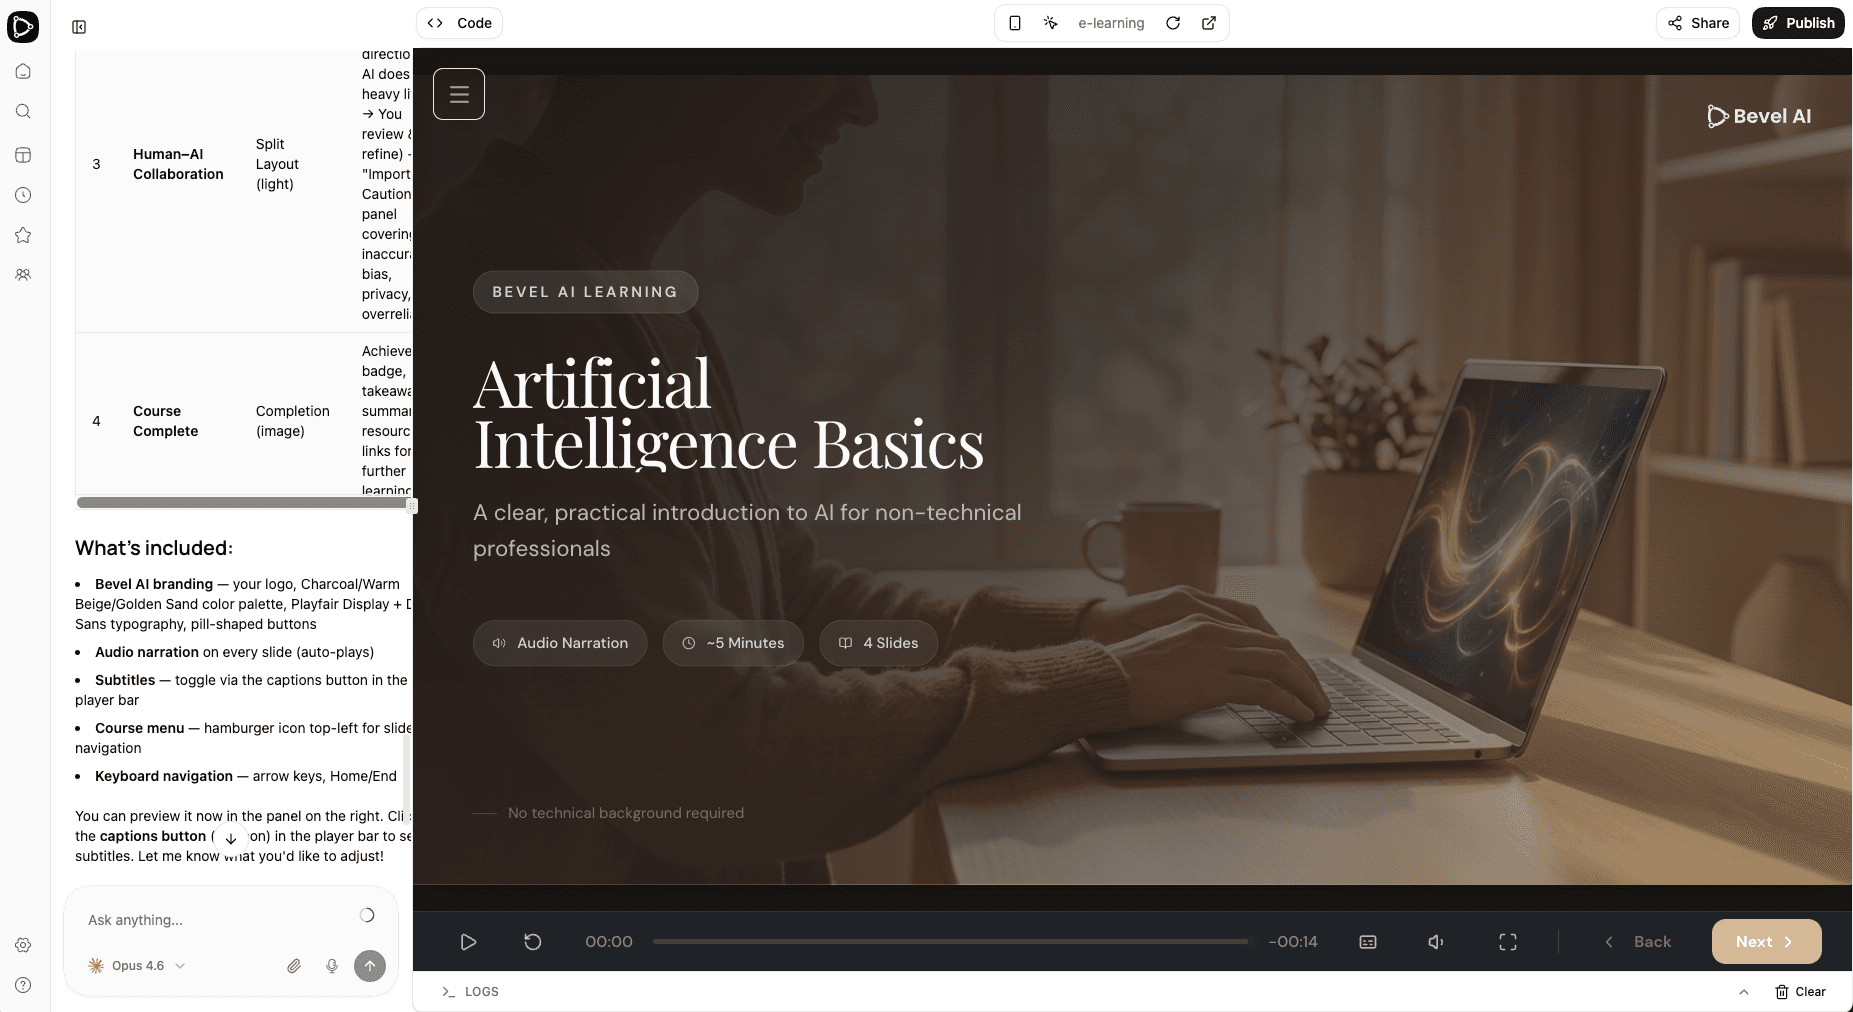
Voila! The draft version of your AI course is ready. Scroll through the course and see how it looks.
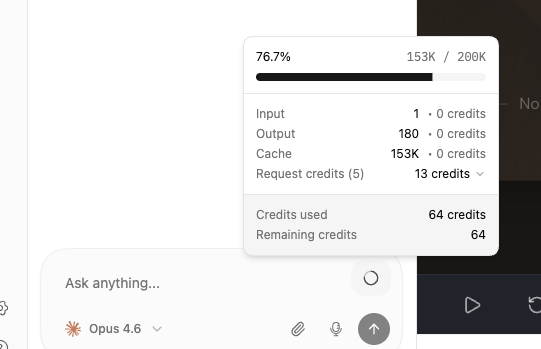
Track Your Credit Usage
You can follow the cost while developing your course by hovering over the circle symbol in the upper-right corner of the chat input window. It will show how many credits you have used in the current chat and how many credits are remaining.
Step 3: Iterate and Refine
Now start making edits, improvements, and changes. You can ask the AI agent for anything in the chat — from structural changes like adding new pages and interactive exercises, to fine visual tweaks like adjusting font sizes, colours, or element positions. Impact Learning remembers your conversation context, so you can refine incrementally.
Experimenting with Models
You can switch between AI models at any time by clicking the model name in the bottom-left corner of the chat input window. The biggest and most capable model will always produce the best results — but it can feel frustratingly slow for small edits. Smaller models are much cheaper and faster, but they make mistakes more often. The best approach is to experiment and find the right balance: use a powerful model for complex tasks and design work, and switch to a lighter one for quick fixes. See AI Model Providers for more information on the available models.
Visual Editing Tool
For quick edits, Impact Learning also offers a visual editing tool that lets you click on any element directly in the course preview. When you select an element, the left panel switches from chat to a visual editing view where you can modify the element's content, colours, spacing, and more.
This is often faster than describing the change in the chat, especially for small fixes like correcting a typo or adjusting a colour. However, editing even a simple element can be more complicated than it seems — it might be part of an animation, grouped with other elements, or controlled by a reusable design pattern. The agent evaluates the selected element behind the scenes and decides which editing mode to use.
Manual Edit Mode (Save)
When the agent determines that an element can be safely edited by hand, you get direct WYSIWYG editing. Change the text, adjust colours, or modify spacing in the panel — the changes appear on screen immediately. Click Save to apply.
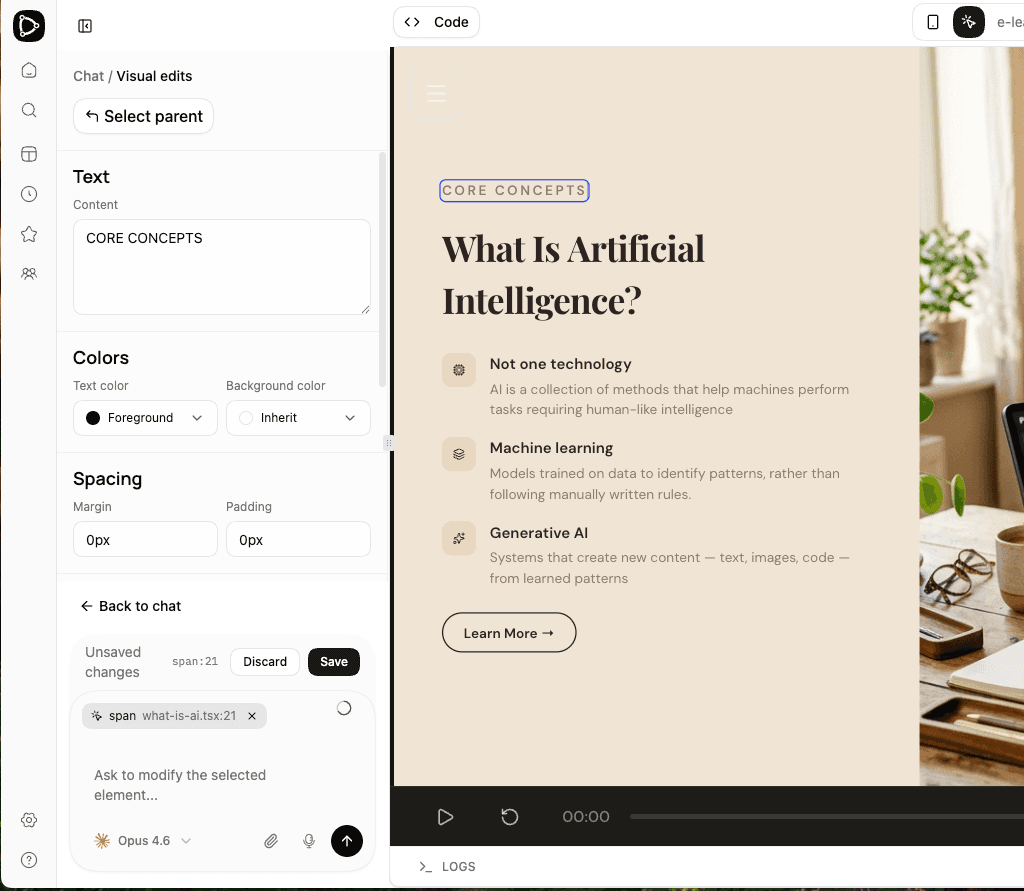
Here a simple text element ("CORE CONCEPTS") is selected. The panel shows "Unsaved changes" and a Save button — edits are applied directly without involving the AI agent.
AI Edit Mode (Send)
When the agent determines that the element requires a more advanced change — for example because it is part of a complex layout or involves animations — it switches to AI edit mode. You can still make your edits in the panel, but instead of saving directly, you click Send. This sends the change request to the AI agent, which applies the update for you. This runs as a lightweight operation without including the full chat history, so it stays fast.
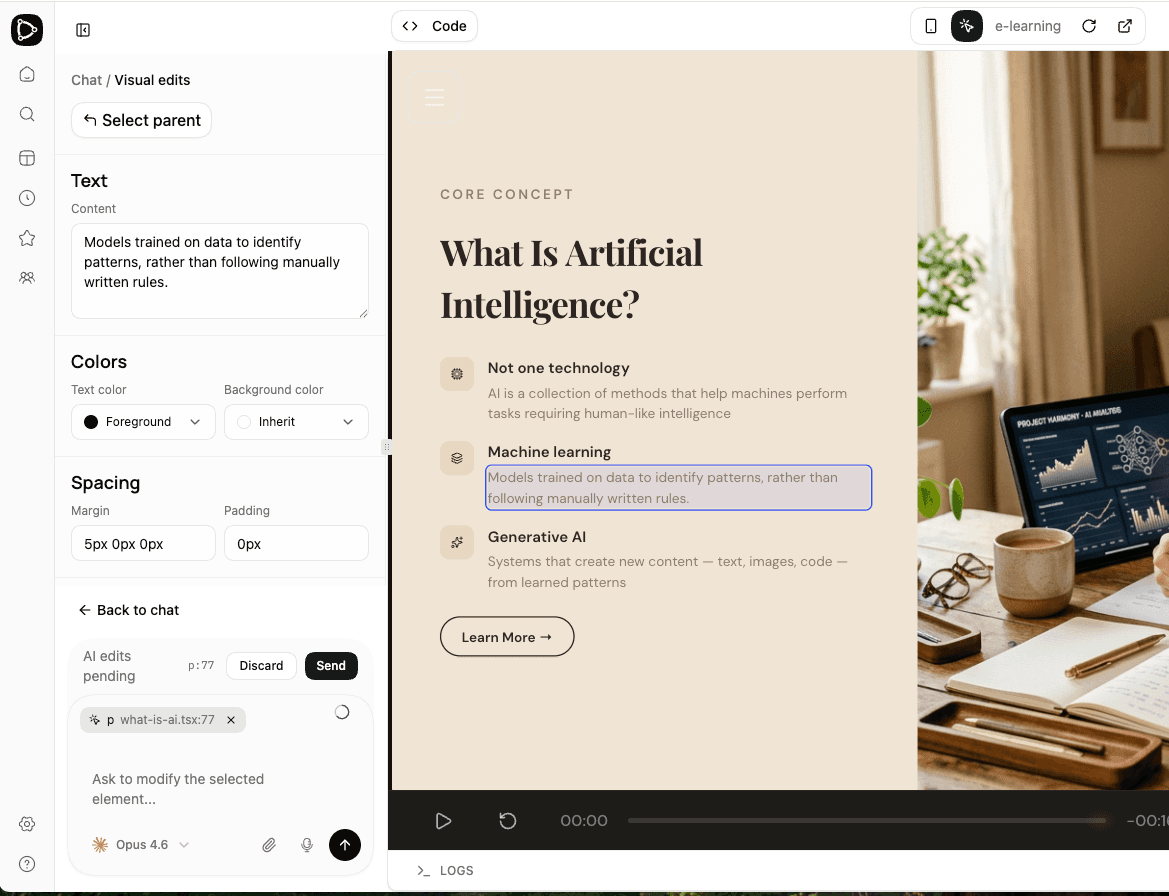
Here a paragraph element (the description under "Machine learning") is selected. The panel shows "AI edits pending" and a Send button — the edit requires the agent to make a more advanced update.
Notice the difference between the two screenshots: different types of text elements are selected, and the button changes from Save (manual) to Send (AI-assisted) depending on the complexity of the element.
Tip: When making quick and simple edits, try switching to a fast and small model like Haiku — in many cases it is powerful enough for the task, but cheaper and faster.
Help the Agent Find the Right Spot
Whether you're using the chat or the visual editing tool, the AI agent does not necessarily know which page you currently have open. To get the best results, be specific about where you want changes. In the prompt, refer to the page by name — or use the visual editing tool to point out exactly where you want the change. The more context you give, the more accurately the agent can target your edits.
Step 4: Create a Page from a Hand-Drawn Image
In many cases you'll want to provide your own images — whether to replace AI-generated ones or to communicate a visual idea to the agent. The input can be a hand-drawn sketch on paper, a rough draft from PowerPoint, a whiteboard photo, or any other image. The agent will interpret your intent and produce a clean, professional result.
Let's try this by adding a new page based on a hand-drawn diagram. Upload the sketch to the chat and give a detailed prompt:
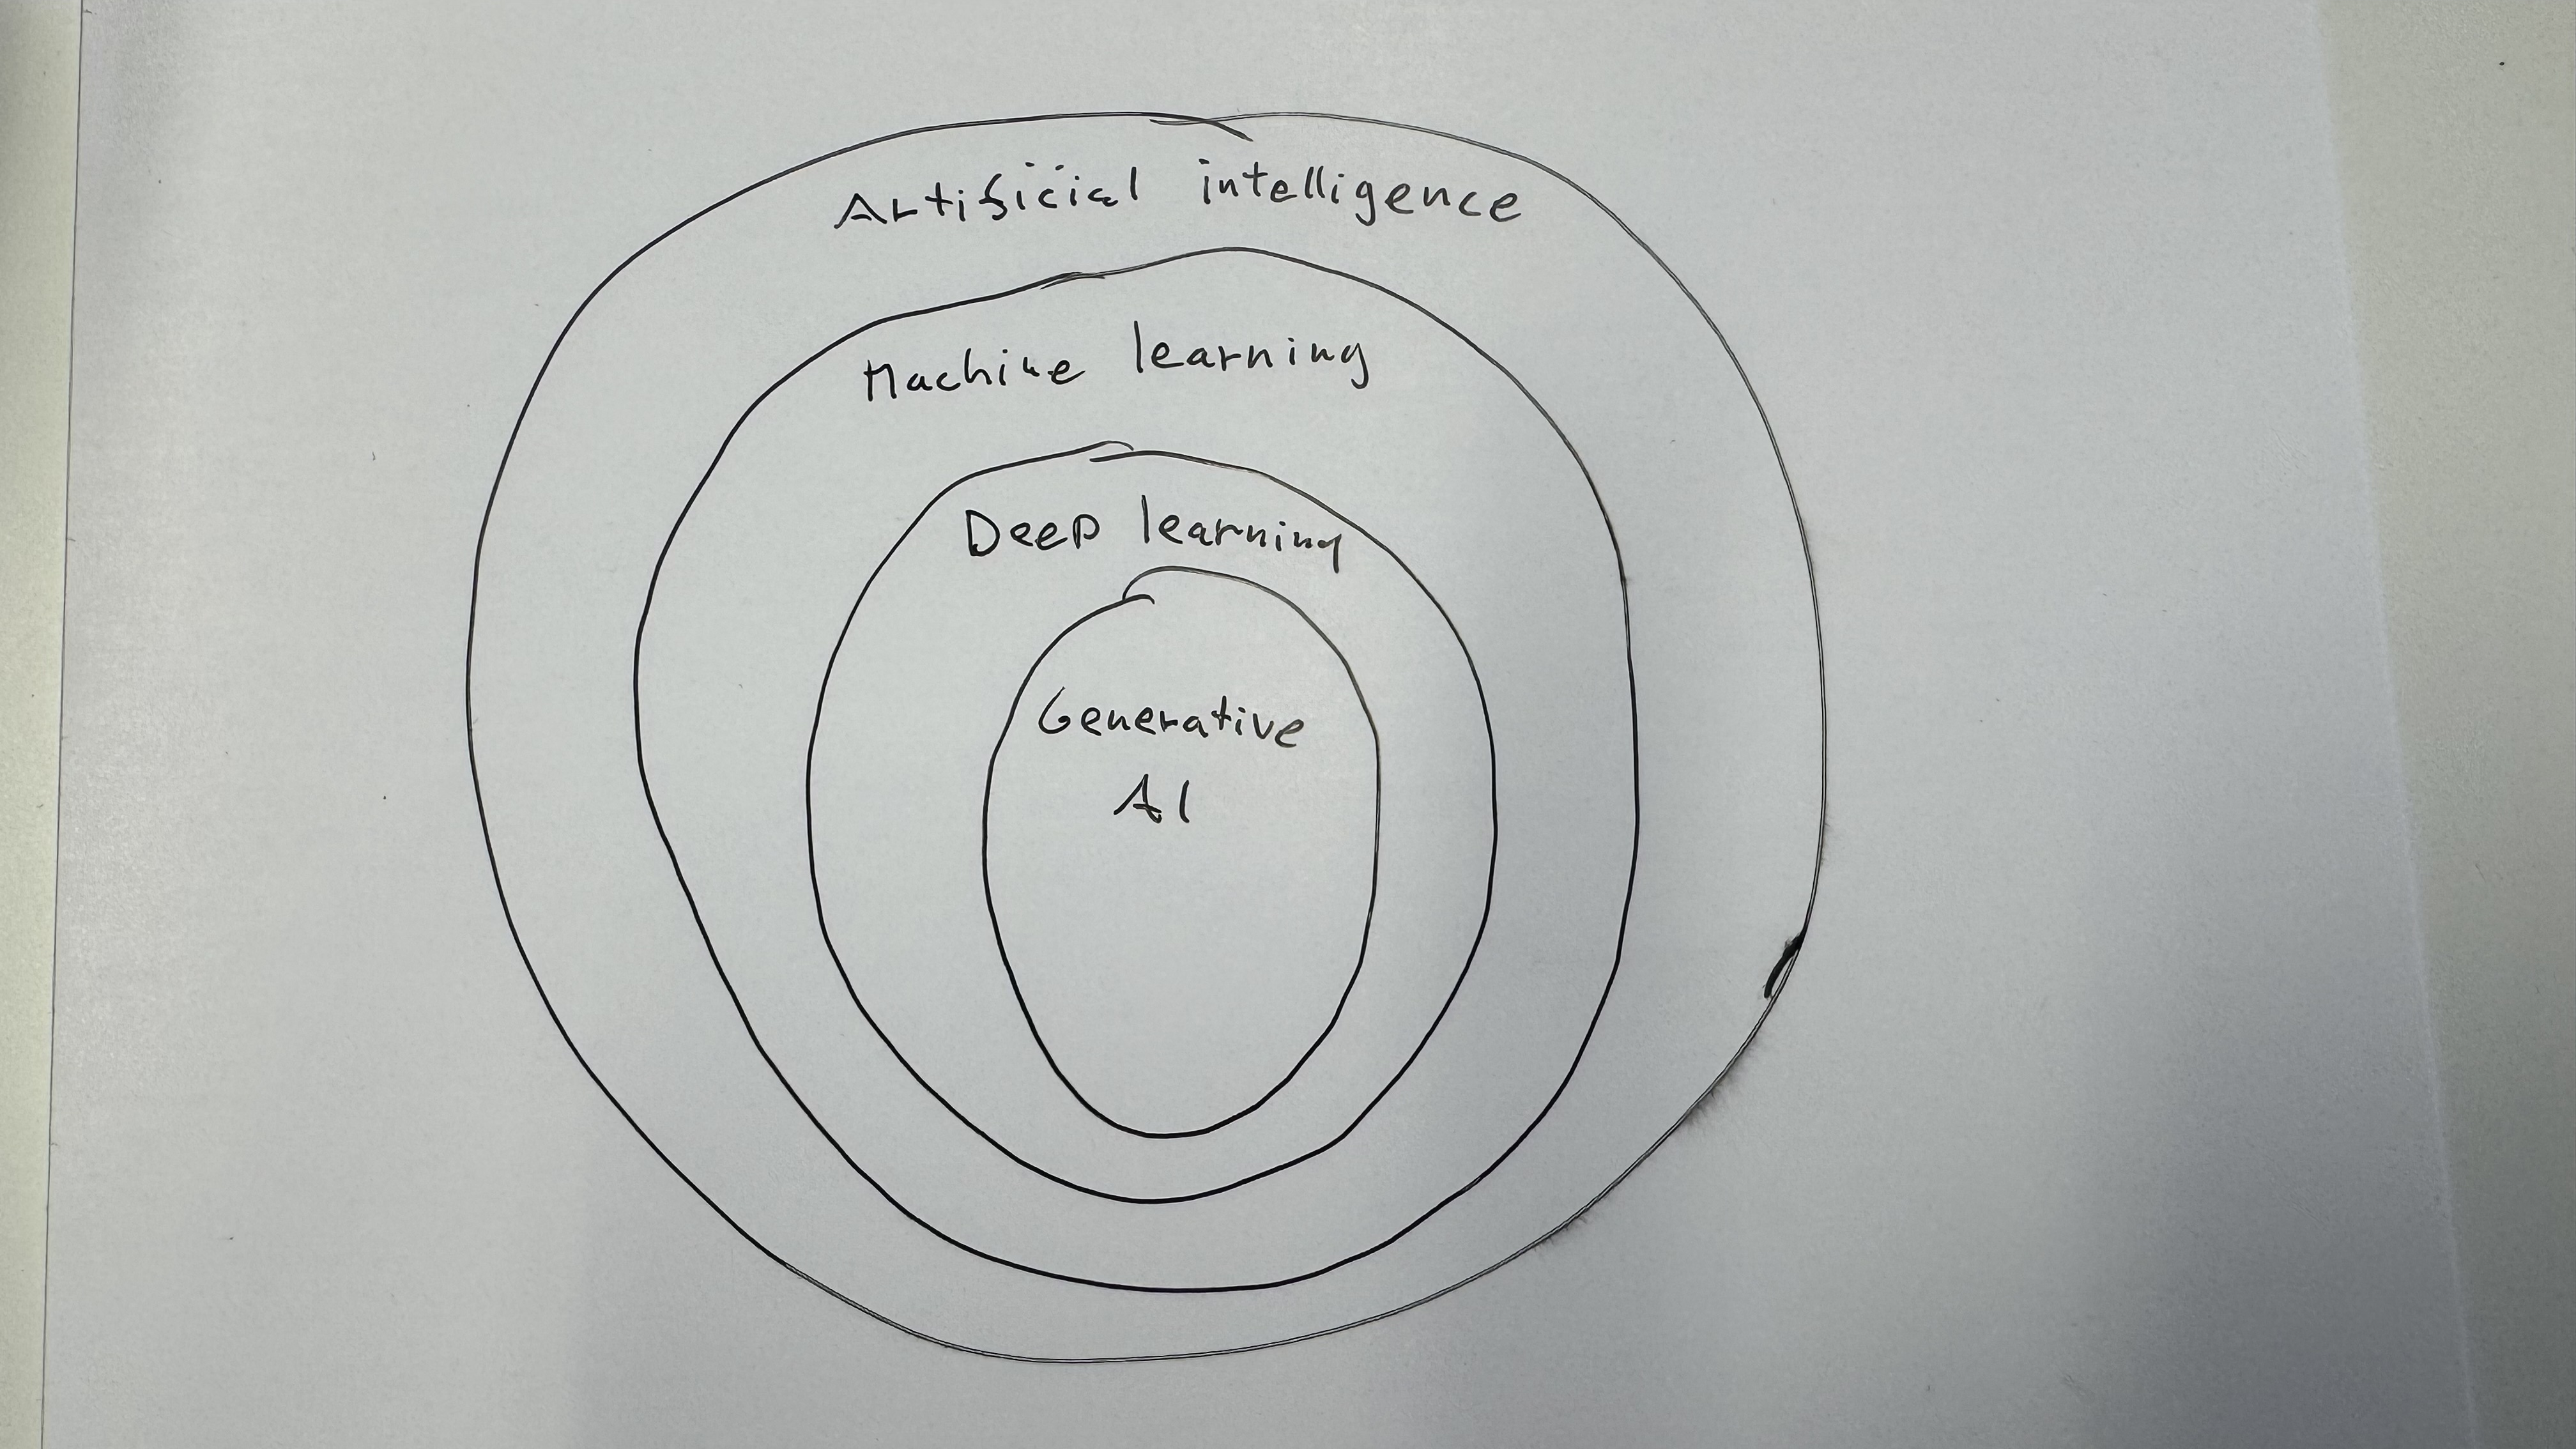
Create a new page immediately after the page titled
"What Is Artificial Intelligence?". Use the attached hand-drawn
image as the reference and create a clean, professional redesigned
version of it. Preserve the nested structure shown in the original
and include clear labels for each nested area directly in the image.
On the page:
- place the improved image prominently
- add a short supporting title if needed
- keep the layout visually clean and presentation-ready.
Also generate a spoken narration script for this page that:
- explains the role of each nested area
- makes the relationships between the areas clear
- is substantive but concise
- stays within 2 minutes of speaking time (about 220–260 words max).
Use the script to generate the audio narration.
The agent analyses your hand-drawn image, generates a professional version of it, creates the page content, and produces the narration audio — all in one step.
SVG vs. AI-Generated Images
In some cases the AI agent may choose to create a lightweight vector image instead of using the image generator. Vector images stay sharp at any size and work well for diagrams, icons, and structured visuals. They are less suitable for photorealistic or richly illustrated images.
If you have a preference, you can be specific in your prompt: ask for an "AI-generated image" if you want a richer illustration, or ask for a "simple diagram" if you want a lightweight visual.
Inspecting the Generated Image
Once the image is ready, you can click on the "Generate image" link in the chat to see the prompt that the AI agent constructed for the image generation model, along with the generated result. This is useful for understanding how the agent translates your intent into a detailed image prompt — and for iterating if you want to adjust the result.
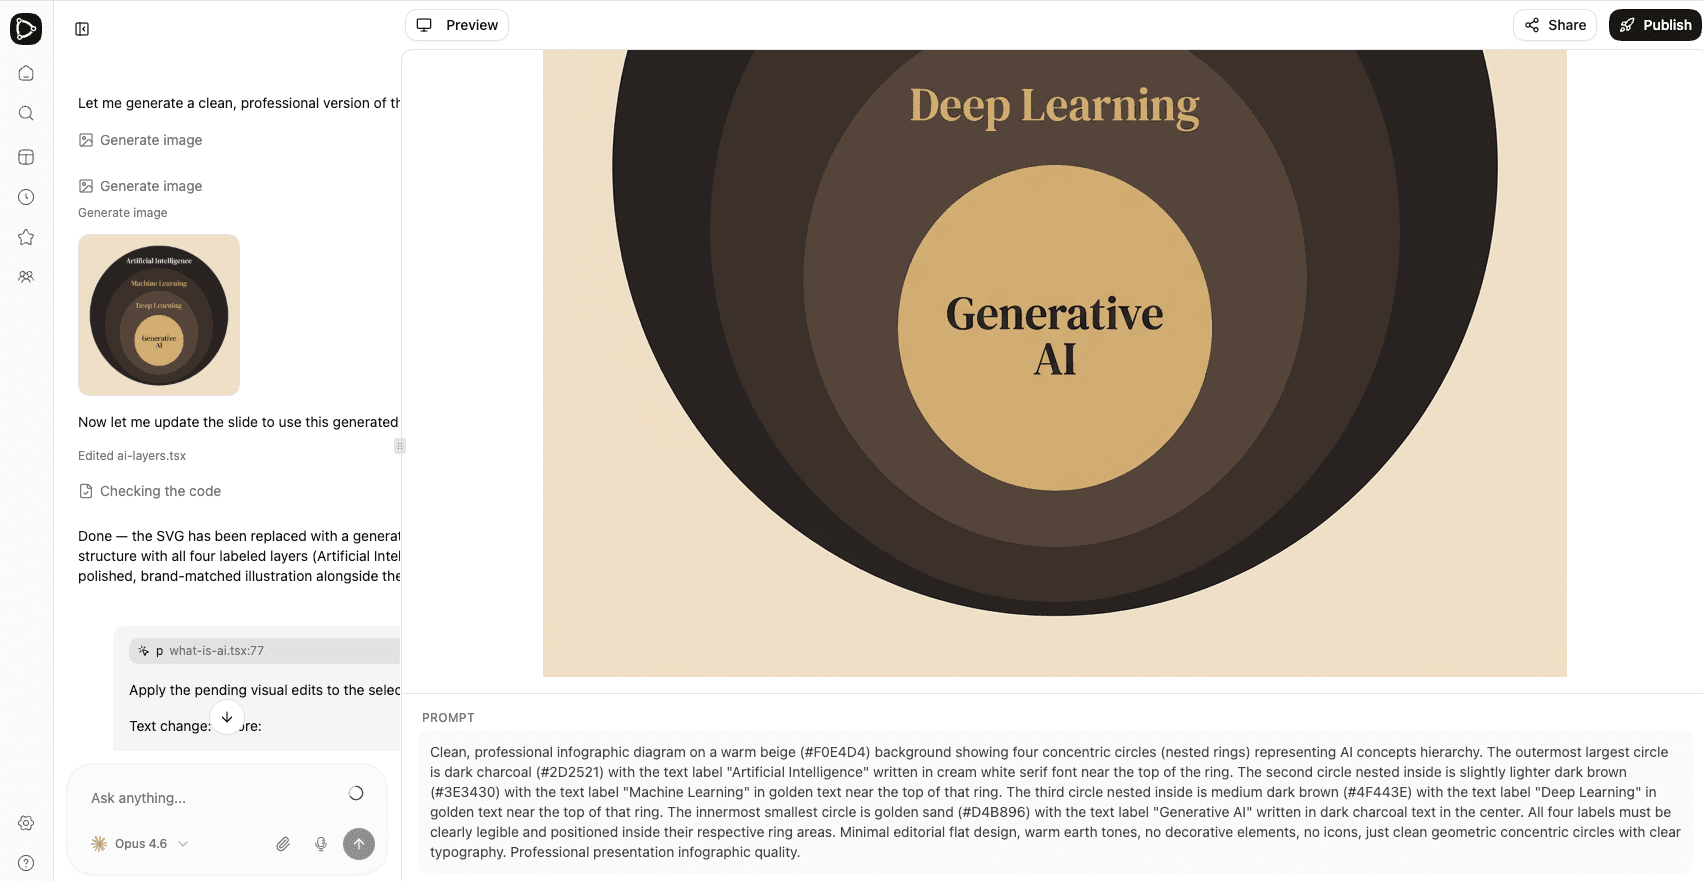
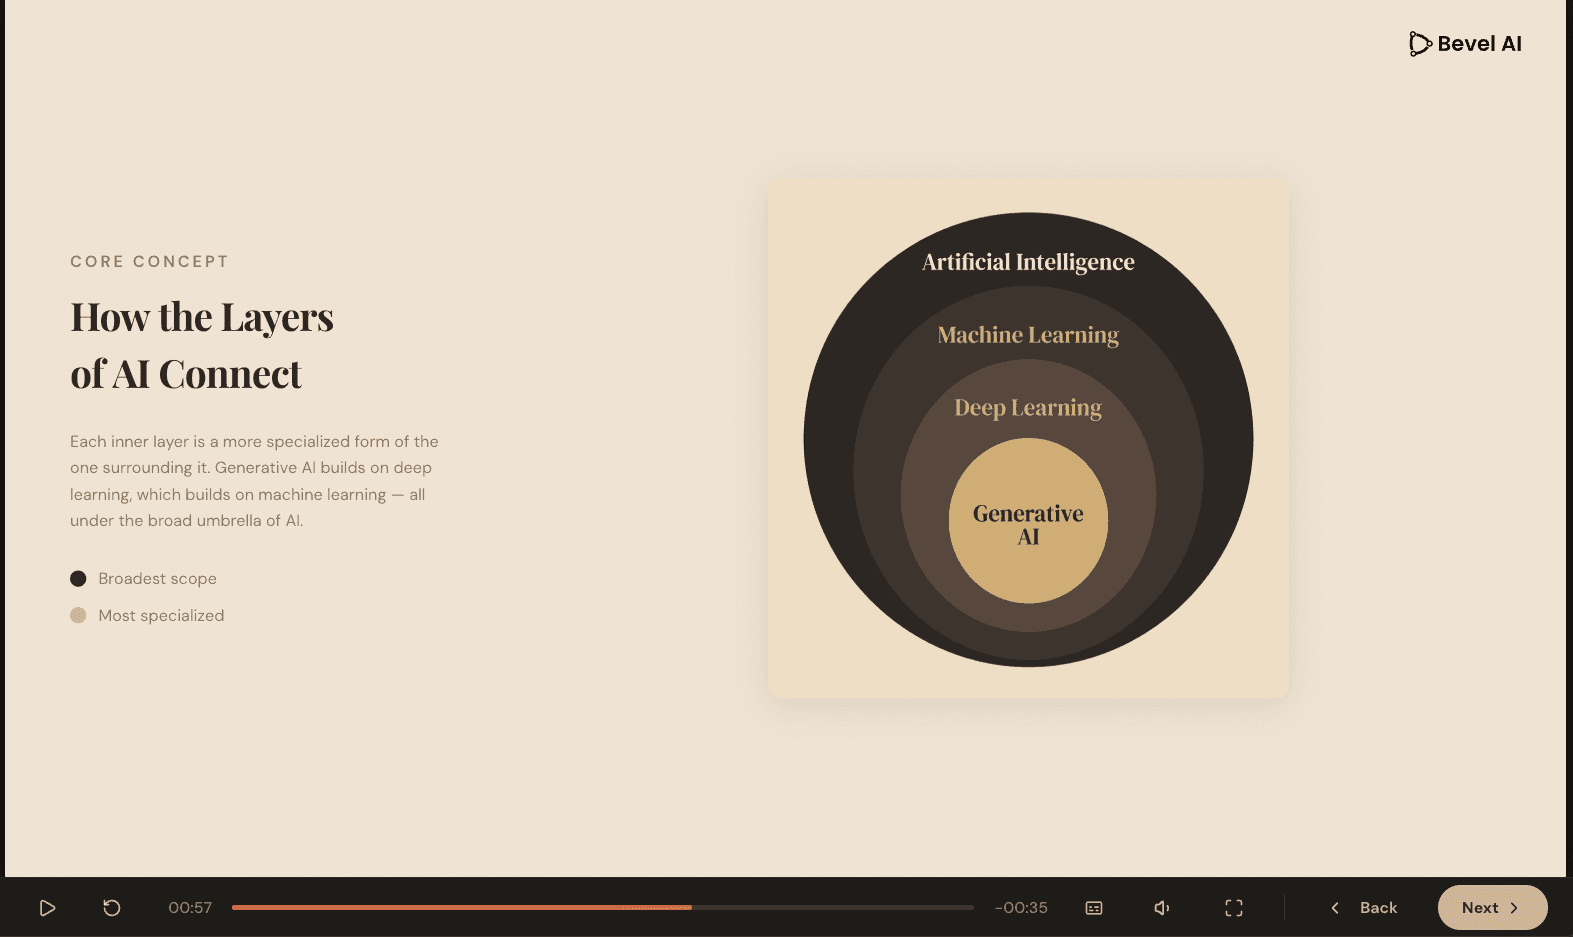
The Finished Page
Here is the final page as it appears in the course — a clean, professional diagram with narration and supporting text, all generated from a hand-drawn sketch:
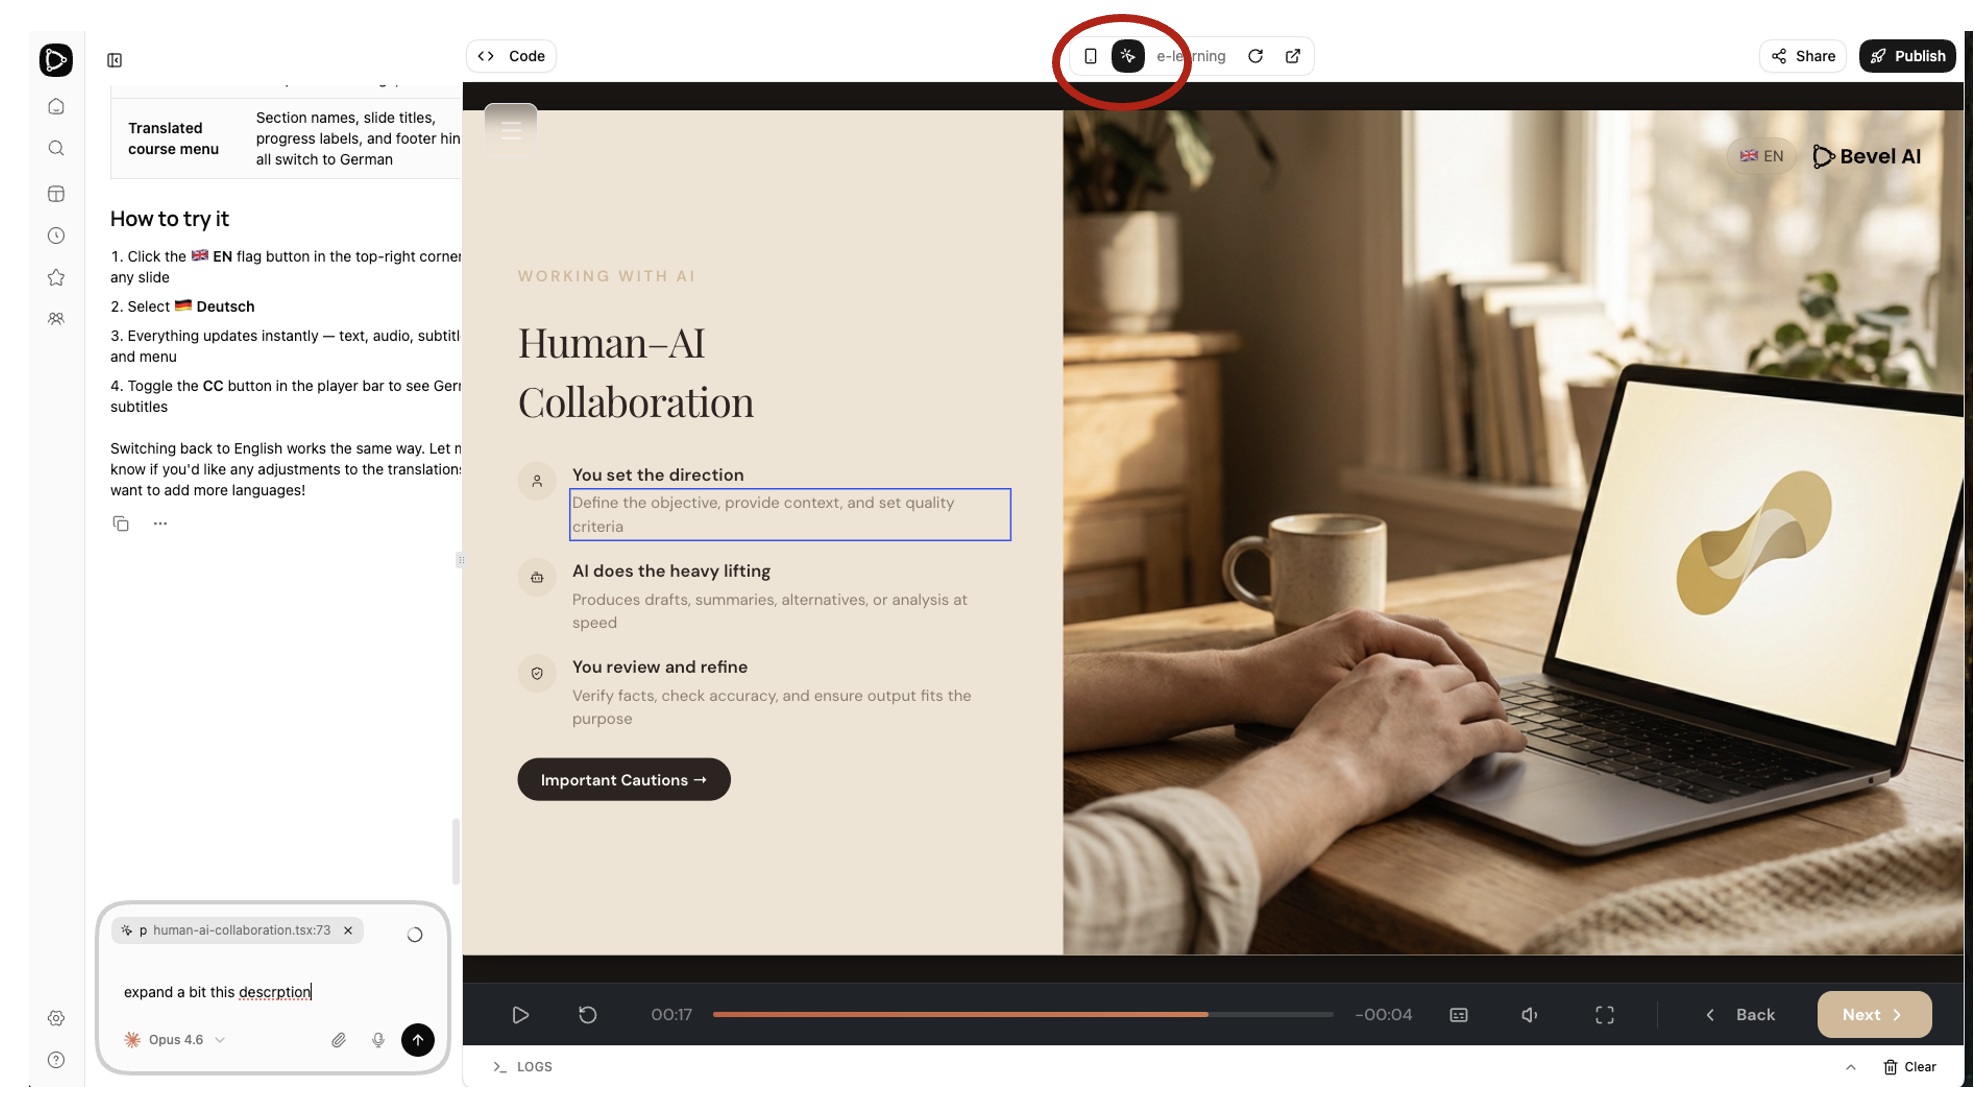
Step 5: Localisation
Creating multilingual courses is traditionally one of the most resource-intensive parts of e-learning production — translating content, re-recording audio, syncing subtitles, and adapting UI elements for each language. Impact Learning makes this remarkably easy. Simply ask the AI agent to translate your course:
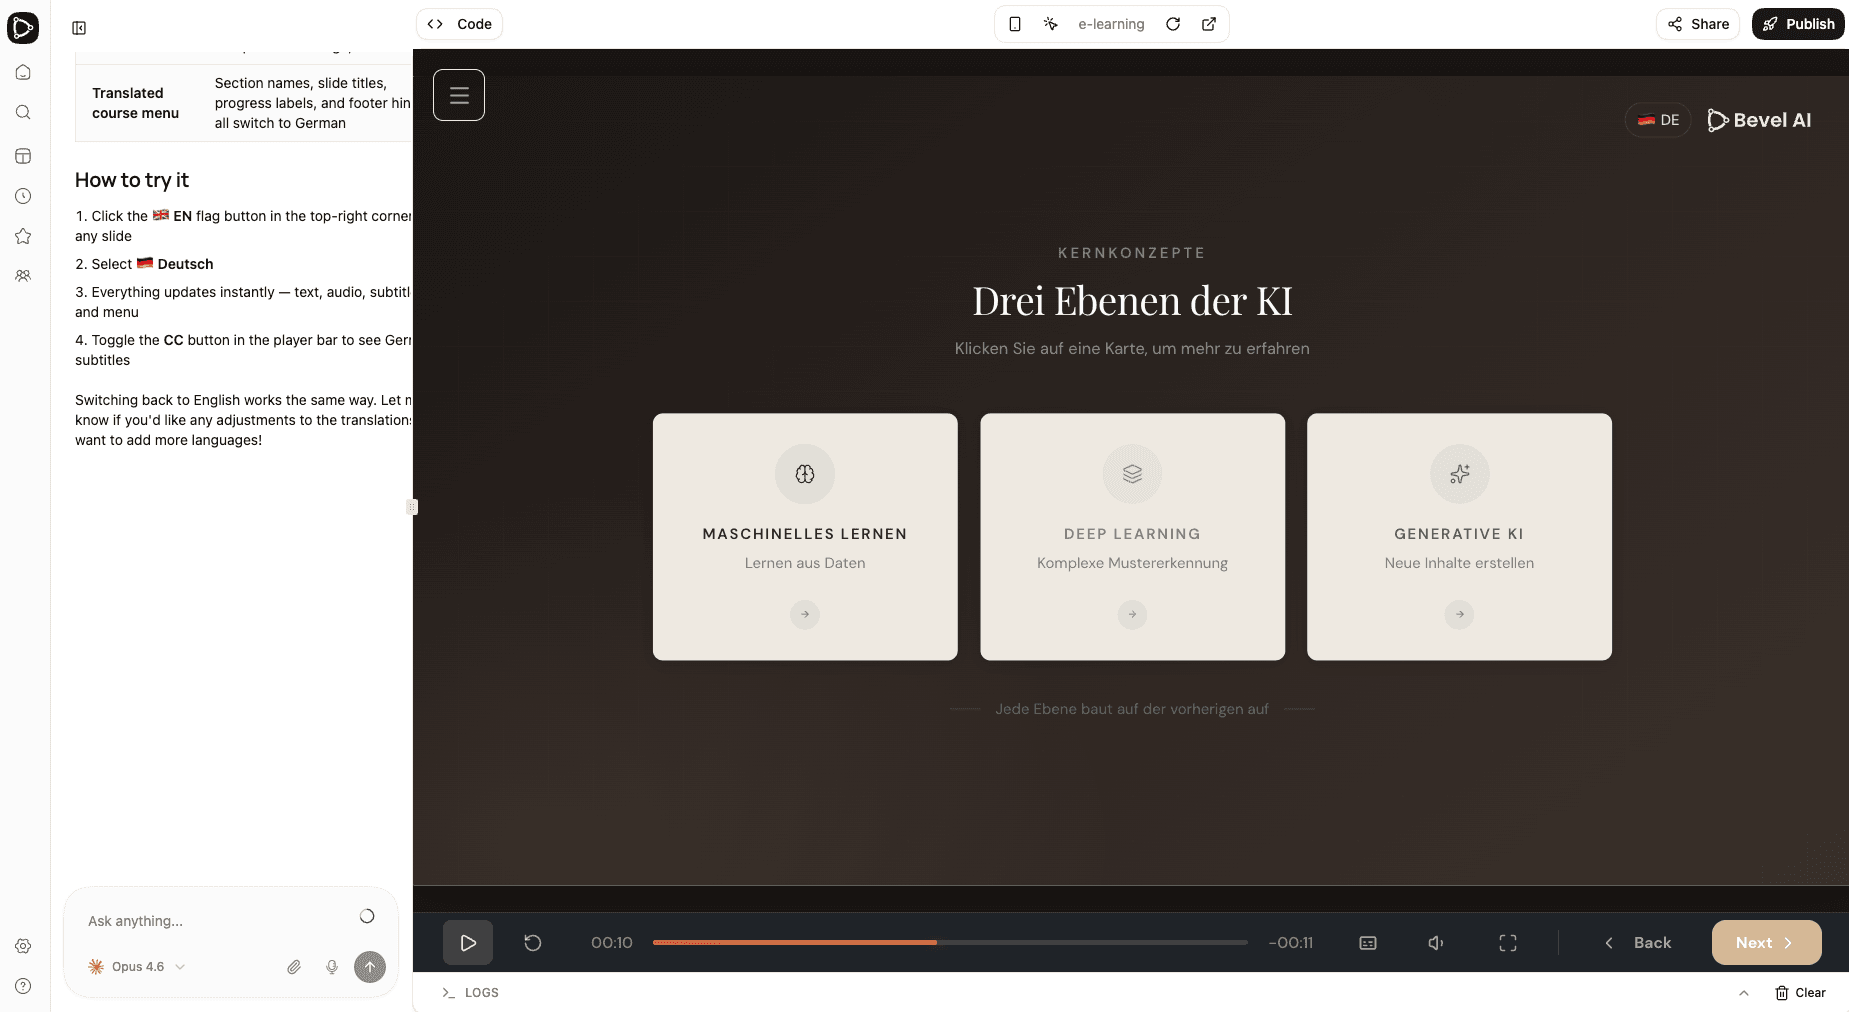
Now translate the entire course into German, including the audio
and subtitle files. Add a language selector with flags in the
upper-right corner, next to the logo.
The agent will translate all page content, regenerate narration audio in the target language, update the subtitles, and add a language switcher — all in a single step.
Try different languages — including those with special fonts and character sets. Impact Learning supports tens of different languages, both text and voice.
Step 6: Synchronising Animations
In almost every e-learning course, elements appear on screen synchronised to the narration. Getting this right matters — poor synchronisation adds considerable cognitive load, as the learner is forced to split attention between what they hear and what they see.
The AI agent can estimate the timing of various elements, but you may need to adjust, especially after localisation where audio lengths change. You can try a prompt like:
Try to improve the synchronisation of how things appear on screen.For more detailed control — especially when working with smaller models — you can guide the agent more explicitly:
Estimate from the speech script the timestamps of different words,
and then consider which element needs to appear on screen at which
timestamp.
Fine-tuning animation timing is often one of the final polish steps, but it makes a real difference in the learning experience.
Step 7: Publish
When your course is ready, click the Publish button in the top-right corner. You'll see several options for how to share your course:
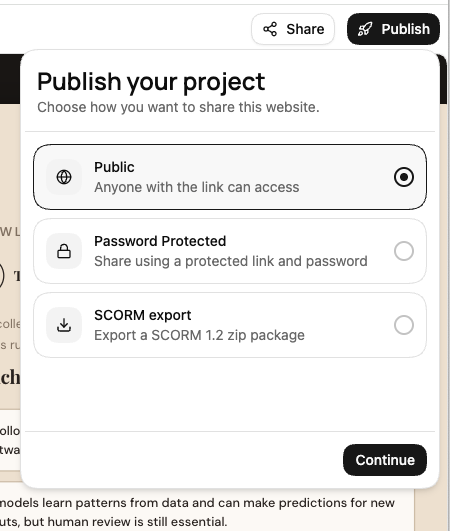
- Public — Anyone with the link can access the course
- Password Protected — Share using a protected link and password
- SCORM export — Export a SCORM 2004 or 1.2 zip package for your LMS
Select your preferred option, click Continue, and your course is live. For more details on each publishing option, sharing with colleagues, and review links, see Publishing and SCORM Export.